
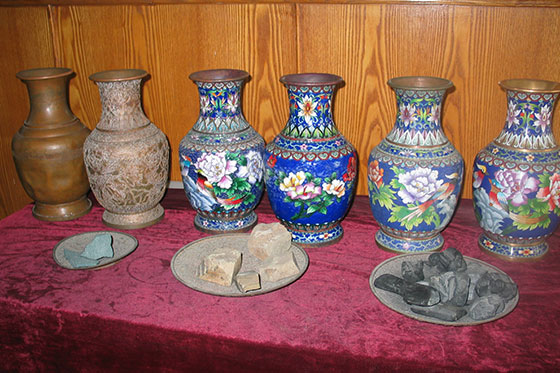
Manufacturing technique of enamels

Technique
This long, refined and complicated process has many manufacturing steps, hammering, interweaving of copper wires, welding, enamel filling, aswell as several stages of baking and polishing, and finally gilding.
Over the years, craftsmen have added their innovating touches, so that today there are many varieties and styles of cloisonné.
The cloisonné is known as 'Blue Jingtai', name of the seventh Emperor Ming, under whose reign, enameling is a craft noted and appreciated.
The first step. Making of the body
The material used for making the body, is sometimes bronze, often copper, because it is easy to hammer and stretch copper.
The copper must be uniform in thickness and weight, and the artist must use sound judgement when shaping it. This is the same kind of work as done by a copper smith, the only difference being that once the article has been shaped, the copper smith’s work is finished, whereas the craftsman’s work has just begun.

The second step. Filigree soldering
This step requires great care and a great deal of creativity. The artisan adheres copper wires onto the body. These ones are of 1/16 inch in diameter. The wires or filigree thus adhered make up a complicated but complete pattern. The artisan has a blueprint in mind and he can make full use of his experience, imagination and aesthetic vision when applying the copper strips on the body.
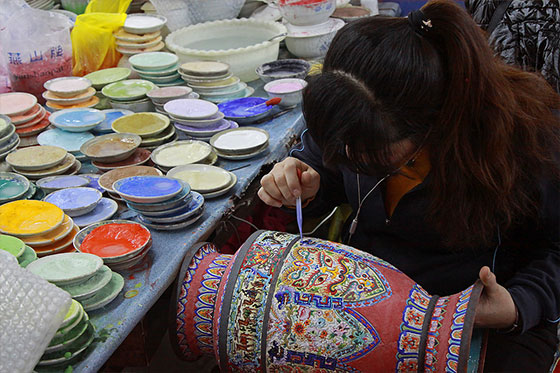
The third step. Applying of colour
This is known as enamel filling. The colour or enamel is like the glaze on ceramics. It is called falang. Its basic elements are boric acid, saltpetre and alkaline. The colour differs according to the amount and types of minerals used. Usually adding lot of iron will give some grey, uranium will turn yellow, chromium green, zinc white, bronze blue and gold or iodine some red. When it is time to do the filling, all of the colours, ground beforehand into a minute powder, are set in front of the workers to beapplied to the little compartments separated by filigree.
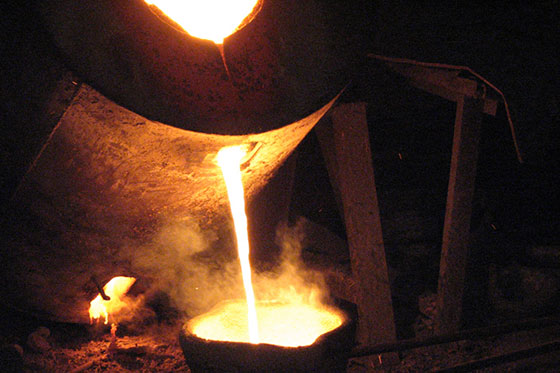
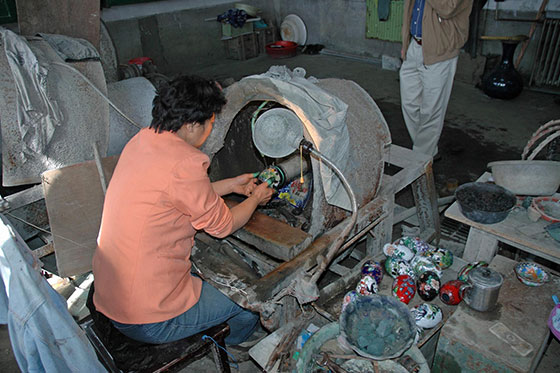
The fourth step. Enamel firing
This is done by putting the article to the crucible. In just a short time, the copper body will turn red. After firing, the enamel in the little compartment will reduce, so it will require refilling. This process will go on repeatedly, until compartments are finally filled.
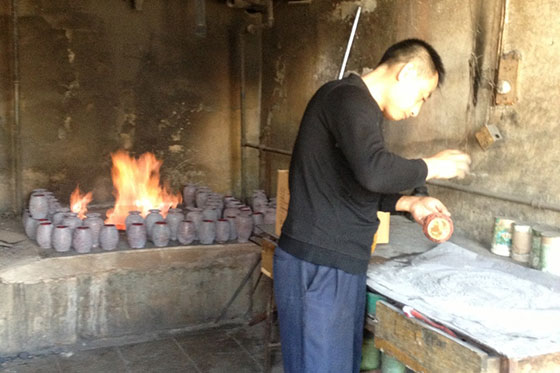
The fifth step. Polishing
The first polish is done vigorously. Its aim is to make the filigree and the filled compartments even. The whole piece is returned to the fire and afterwards polished once more with a sharpened stone. Finally, a piece of hard carbon is used to polish again, to give the surface added lustre.
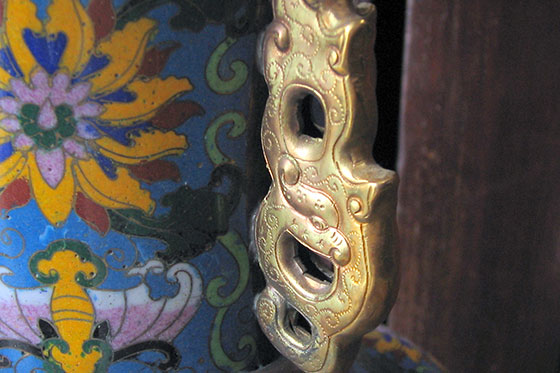
The sixth step. Gilding
This is done by placing the article in a gold or silver bath and then subjecting it to an electric current. The exposed parts of the filigree and the metal fringes of the article will be smoothly and evenly gilded. After that, the metal part of the article will never get rusty. Then the article will again undergo another electroplating and be given a final light polishing.